
Beginning Lamp Restoration
So, you just purchased a "new" center draft lamp. The lamp was undoubtedly made during the Victorian Era and thus is well over a century ago. In all probability the lamp has not been used in decades. Kerosene fuel precipitates paraffin (wax) and as it slowly evaporates it leaves a very sticky, gummy residue almost like varnish. Even though there is a rush of excitement to get the lamp into operation, the lamp should be thoroughly disassembled and cleaned, yet in many cases the lamp parts are literally "glued" together.
Disassembly 

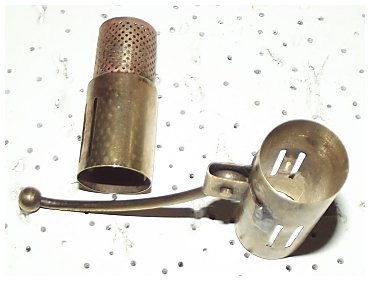
DO NOT FORCE ANYTHING TO MOVE! Do not try to remove a burner that is glued to the font. Burners are fragile and parts have not been made in a century, so carefully cleaning before use is virtually mandatory if you expect the lamp to work properly for another century. Read the article below to see how to remove a burner without damage, as shown at right when a fragile burner is crushed trying to remove it without first softening and dissolving the old, dried fuel residue.
Wax melts at about 160 F and old varnish and fuel residue become considerably softer at 180 F. Boiling water is 212 F. That is the starting point of disassembly. Let me give you an example. 
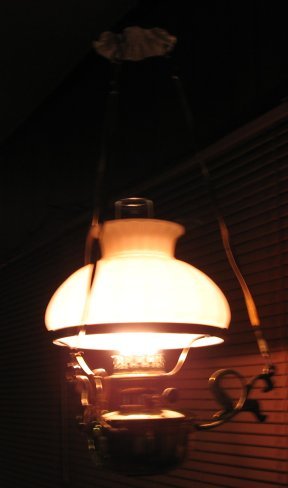
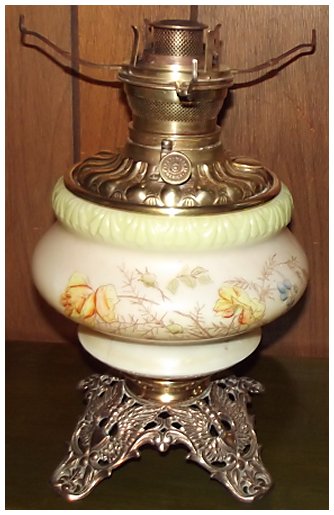
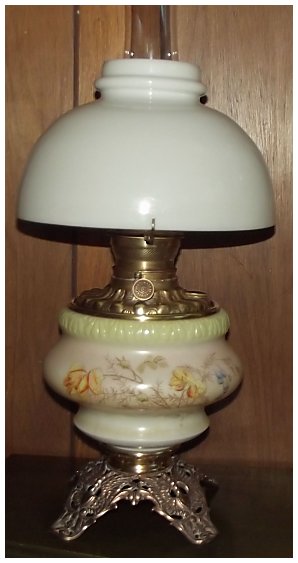
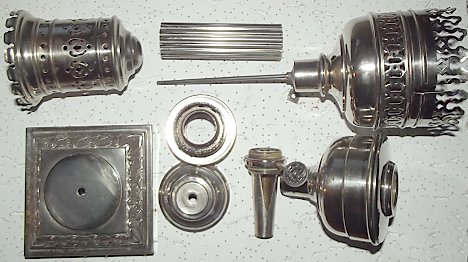
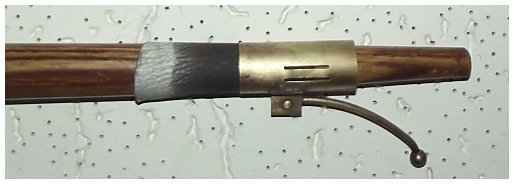
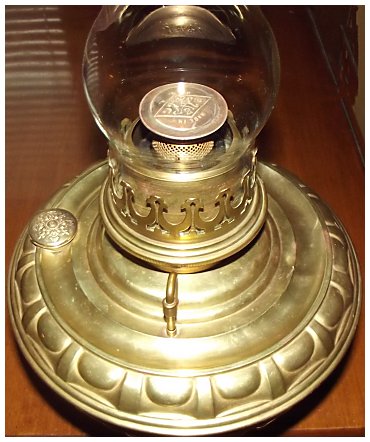
This Veritas lamp had been in storage for a century. The shade ring arms needed to be re-soldered and the the entire lamp polished. At this point it could be hung in it's frame, as intended, but it is only for decoration so far. The photo at righ t was taken after initial assembly and a very minor polish job. This involved some minor soldering and polishing with "Blue Magic Metal Polish Cream" until the buffing rag no longer removed dark tarnish. It is now pretty, but it is NOT a lamp at this point in time.
In the case of this particular lamp, the burner was easy to unscrew, so that was my starting point. The burner could not be disassembled further because the threads were stuck. If the burner had not unscrewed easily, I would have used a large old stock pot I found cheap at a junque shop and boiled the entire lamp. [Note: If you absolutely cannot find a stock pot large enough to hold an entire lamp with burner attached, a heat gun or hair dryer on high setting can be pointed directly at the burner threads and that joint heated until it begins to smoke, then while wearing leather gloves it may be possible to unscrew the burner. That does nothing for the junk inside the burner or the font, so boiling is still required, but it does result in smaller pieces so a smaller boiling pot is needed. Boiling the entire lamp is still my preferred method of softening residue so a burner can be removed.] 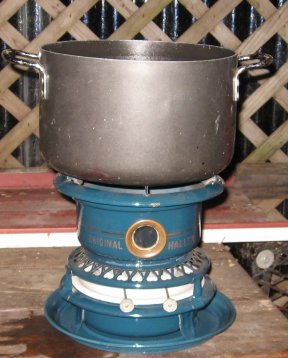
The burner was placed in the stock pot shown at right, covered with water, and a quarter cup of liquid laundry detergent added, and the water boiled. This is a smelly project best done outside. An Original Haller stove from the 1890's need not be used, but it did seem proper (if a little nutty) to use a Victorian era German stove (Ottensen) to boil the Victorian era German (Nurenburg) lamp burner.
The old wax and dissolved fuel residue floats to the surface of the water and is poured off. Then, while wearing leather gloves because the burner was still hot, the parts of the burner could be unscrewed. This operation MUST be done while the burner is still hot as that is when the varnish between the threads is soft and parts may be unscrewed or removed without undue force that could damage anything.
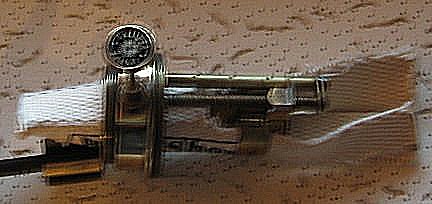
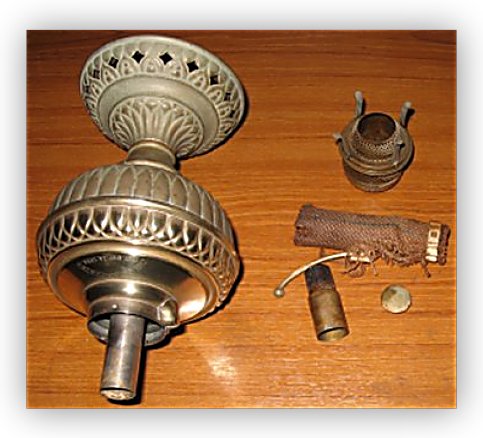
It worked! Two hours of simmering and the burner unscrewed easily. The fount with flame spreader and outer wick tube removed. The original wick is visible, hardly burned at all. 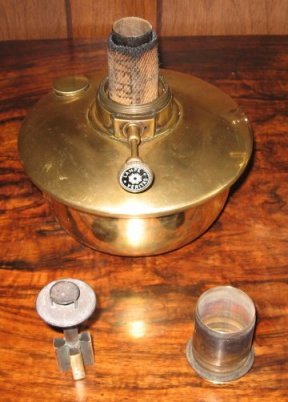 While still hot Icleaned the threads and then applied a very light coat of "Never Seez" to the threads with a Q-Tip.
Another product that protects and lubricates threads is "Sil-Glyde Lubricating Compound," a silicone compound with the consistency of toothpaste. The intended use is brake parts, trunk seals and weather stripping on doors and windows of vehicles and is available in auto parts stores.
The photo at right shows the burner with a new wick installed. The wick had to be notched to match the original, shown far right.
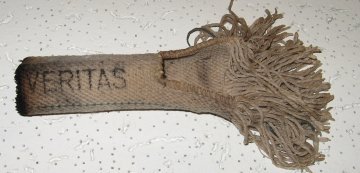
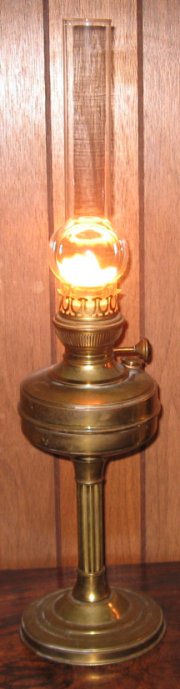
The Veritas 20''' burning brightly for the first time in a century! Before burning, the wick as saturated with kerosene, raised 1/16" above the draft tubes, and lighted. The chimney and flame spreader were installed and the wick allowed to burn out, thereby leveling it evenly. The fount was then filled with Low Odor (or Odorless) Mineral Spirits, and lighted after 15 minutes. The flame was steady, no flickering, and quite bright. There was a reason why Veritas lamps were held in such high regard - they worked, and worked well. With a little restoration and decent care, a good lamp like this will easily last another century.
The above illustration was an easy one because the lamp had been placed in storage "dry," without fuel in the font, and had been kept fairly clean over the years. That is an exception as many old lamps have been sitting on a shelf in an attic for decades and were put away "wet" with fuel in the font.
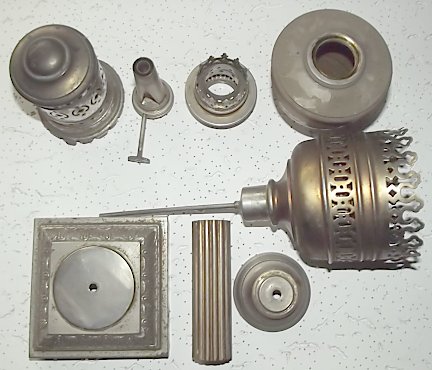
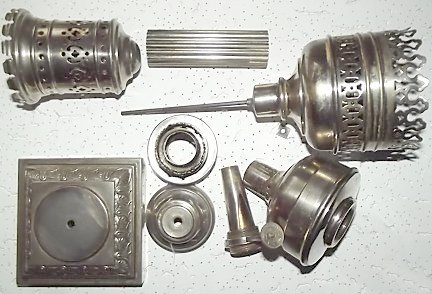
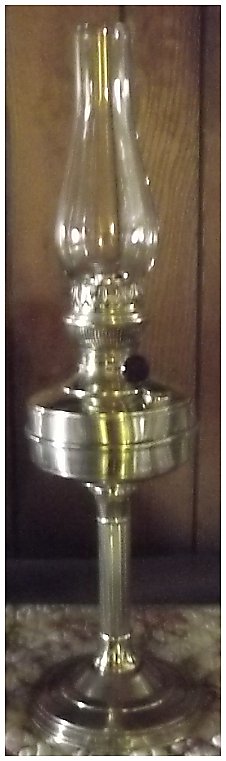
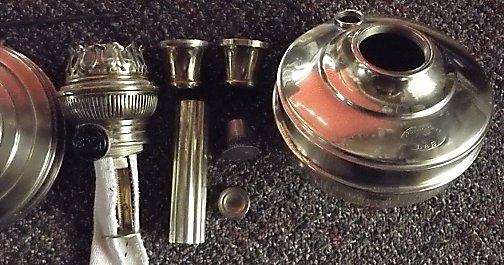
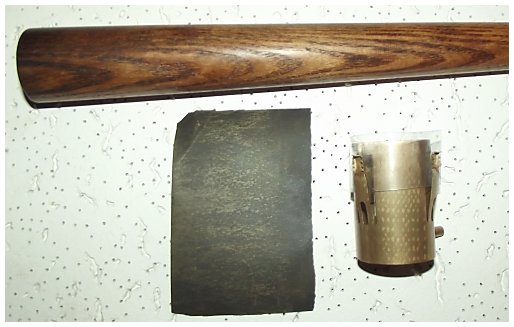
Another illustration of restoration by boiling. The first photo at shows a Rochester Jr. as purchased. It was stored "wet" and was glued solidly together. The middle photo shows the lamp disassembled after simmering for an hour, with a bit of polishing to the very top of the fount. Photo at right shows the lamp after a couple of hours of polishing with Blue Magic. Click to enlarge.

![]()
The Jr. Rochester above was now pretty, but still did not function properly because of old varnish and fuel residue on the inside of the lamp. The center draft tube was sticky and the inside of the wick sleeve was coated with a hard yet gooey residue that simply clogged emery paper.
If boiling a lamp in detergent was to remove remove a stuck burner and it does not remove easily, don't force it! Move on to the next step of boiling in citric acid as that will almost always work as the hot citric acid bath can then work on the stuck threads without any grease, oil or old dried fuel residue in the way. Scroll down to see that process on the Jr. Rochester.
CITRIC ACID CLEANING 
Citric acid powder is sold in the home canning section of many hardware stores. The entire lamp - font and burner, all the parts - were submerged in water in a large stock pot, a tablespoon of powdered citric acid added to the water, then the water heated until it almost boiled. The heat was then turned off, a lid put on the stock pot, and everything soaked for an hour. The citric acid reacts with old fuel residue and gunk by turning it into a stiff, dark granular oxide - it is no longer a sticky mass. And that is how you determine the progress of the process. When you see a part start to have black splotches, remove it from the pot and brush it off in warm soapy water. If the black spots wash/brush off, that is enough soaking. If not, put it back in the hot citric acid solution for another 15 minutes.
The parts and pieces are removed from the hot stock pot with tongs, and then scrubbed with a standard kitchen brush. Hard to reach areas like between the chimney prongs can be brushed with a basting brush with bristles at the end. That thoroughly cleans the outside of the lamp and most of the burner parts. The draft tube and wick sleeve, though, require careful cleaning so the wick sleeve will move over the draft tube smoothly so when the lamp is assembled the wick will move smoothly up and down.
If the parts are not cleaned, if tarnish and/or corrosion are not removed or rendered into a soft coating that is easily brushed off in hot soapy water, you were not using enough citric acid in the boiling water solution. Add more citric acid powder and do it again. A teaspoon of citric acid per half gallon of water can be required on some badly tarnished lamps.
Example of citric acid bath cleaning - brass finish 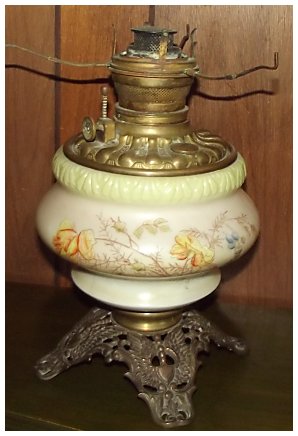
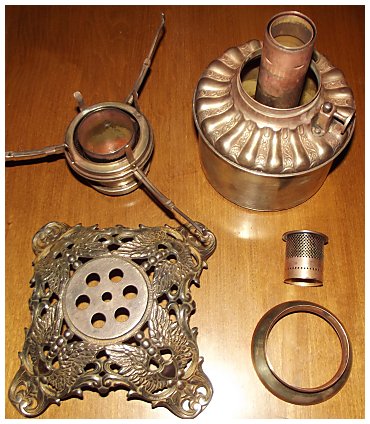
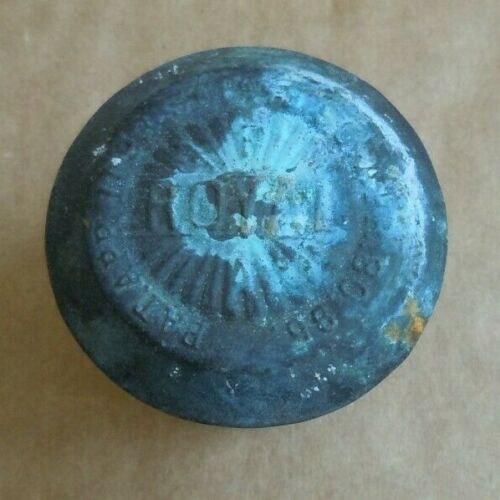
At right, an 1895 P&A Royal 'GWTW' lamp which most likely had never been polished since it was made. The foot was almost black. There was a half inch of dust inside the glass on the base! The flame spreader and burner vents were so clogged that air could not pass through them. The flash on the camera made it look better than it really was.
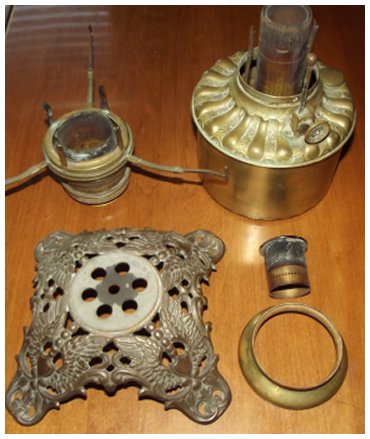
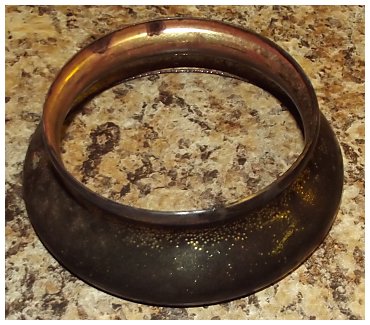
At far right, the parts disassembled and ready for soaking in 200 F hot water with a tablespoon of citric acid. Note the ring on the lower right side of the photo.
|
|
|
|
|
The photo above is of the ring which holds the base of the glass after it was removed from the citric acid bath. The oxide from corrosion was turned black. |
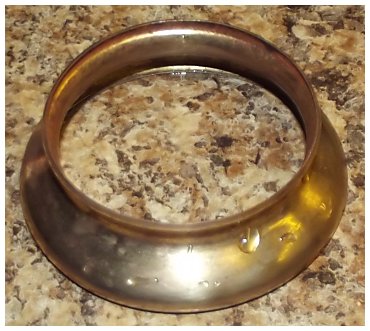
Above, after brushing in warm soapy water using a common kitchen soft bristle brush. The black oxide corrosion is gone! Click on the photos to enlarge. |
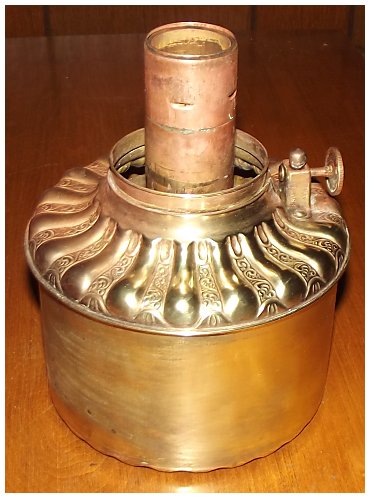
Above, of the parts after being washed & brushed in hot soapy water. Compare the photo to the one above it, noting particularly the flame spreader and burner. |
|
|
|
|
|
The photo above shows the right side of the font polished quickly with Mother's Chrome Polish. The difference is obvious. |
Above, the assembled lamp with all parts polished. Because of the citric acid bath, polishing the parts was very quick and easy. |
Behold, a fabulous P&A Royal GWTW lamp ready for use, as beautiful as it was when sold new by P&A in 1895. |
|
At right, the parts for a W&W French Garden Lamp as it was received straight from a French garden, spider webs and dirt included. Far right, the same parts after soaking in citric acid and scrubbing in hot, soapy water. |
|
|
|
|
At left, the same parts after being polished with "Mother's Chrome Polish," the nickel finish shining brightly.
At right, the finished, assembled lamp. Click on the photos to enlarge them. |
|
|
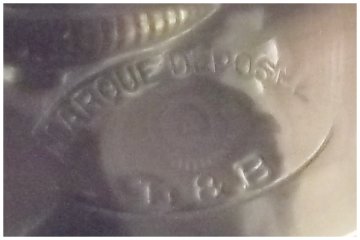
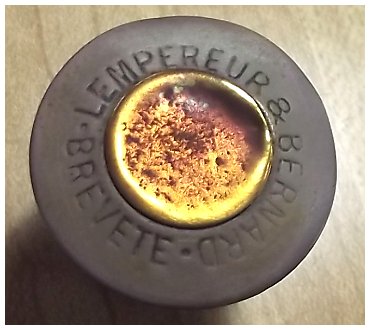
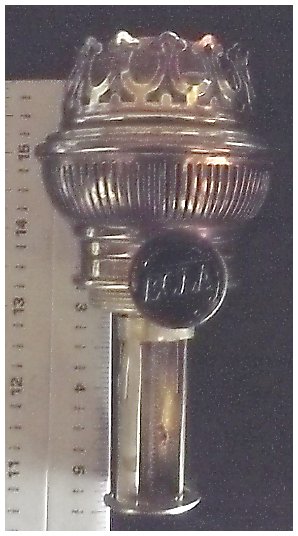
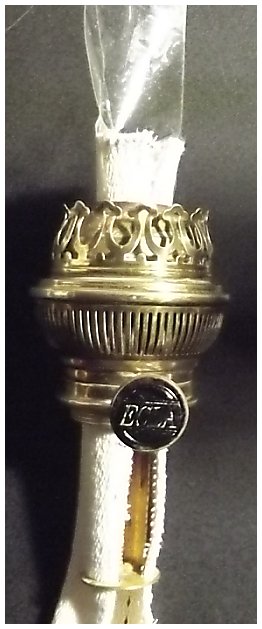
Lempereur & Bernard Brevete, 15''' Kosmos Brenner. Near right, unpolished. Far right, after soaking in citric acid and polished. The citric acid bath works equally as well on either nickel plating (above) or brass lamps, as shown at right. Below, left to right: all parts disassembled and polished after citric acid bath and scrubbing in hot soapy water, L&B embossed name, flame spreader. Second row below, left to right, wick carrier, wick carrier after a citric acid bath, wick installed by adding a tape extension and pulling through from the bottom, and wick installed.
|
|
|
|
|
|
|
|
|
|
|
Update April 4, 2020 Flame_Spreader cleaning.
|
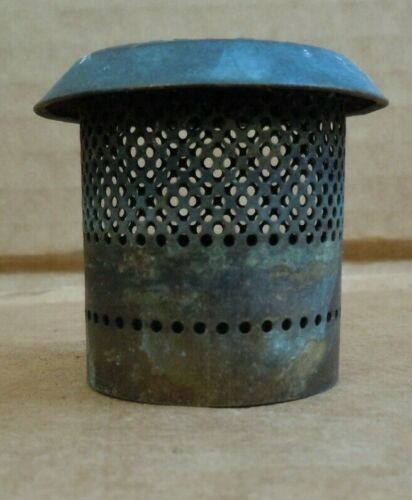
I needed a new demonstration project and saw this flame spreader on eBay for $5.99 delivered! The seller was proudly selling it ''as found'' and leaving it up to the buyer to ''finish cleaning." I was the only bidder. |
|
|
|
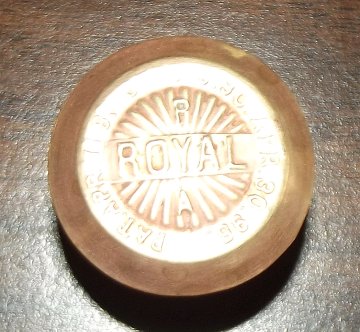
At right, the same flame spreader after 15 minutes in a hot citric acid bath and 3 minutes scrubbing with 0000 steel wool. No damage at all and now worth far more than $5.99 delivered. |
|
|
CLEANING THE WICK SLEEVE AND DRAFT TUBE
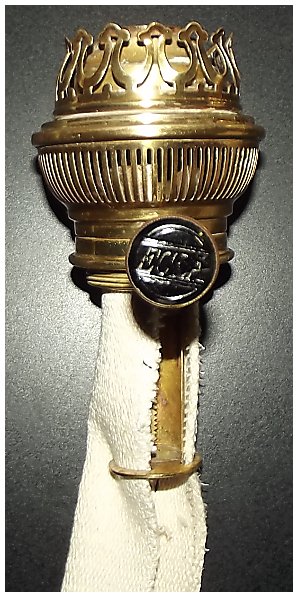
|
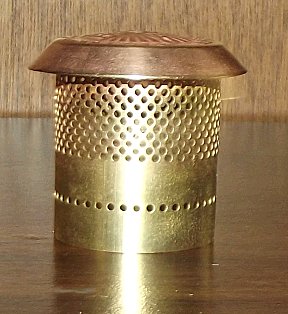
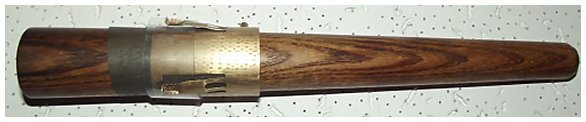
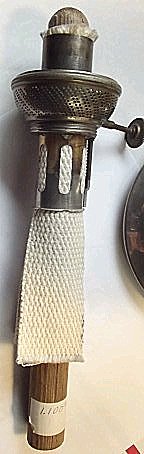
Some lamps have wick sleeves that hold the wick on the inside, such as the one illustrated by the photo on the right. This wick sleeve need only be brushed inside and out after soaking in citric acid and will be clean enough to use because the wick inside the sleeve is in contact with the draft tube. Wick sleeves which fit the draft tube and hold the wick OUTSIDE the wick sleeve like Rochester and Miller lamps need to be thoroughly cleaned and polished inside the sleeve. |
|

Any dowel that will fit inside the wick sleeve can be used to clean the inside of a wick sleeve so long as it can fit relatively snugly while being wrapped with a piece of emery paper.
|
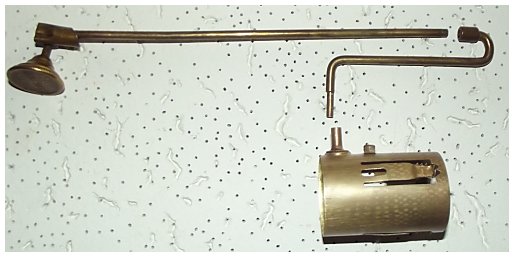
I made some tapered dowels on a wood lathe from old, broken tool handles for cleaning the inside of wick sleeves. These tapered dowels simply made the job easier. These two will fit inside the wick sleeve of any lamp from #0 to #2 size. |
|

|
Note the amount of dirt and grime on the sandpaper on the cleaning dowel from the Jr. Rochester wick sleeve. The next step on this small wick sleeve was 400 grit emery and gentle polish the inside from each end. |
|
|
The photo at right shows the inside of the Jr. Rochester wick sleeve after polishing inside with 400 grit emery paper. The polishing must be done gently, of course, as smoothness is the desired end result, not removing a lot of brass. The flame spreader is shown to illustrate how clean it became after the citric acid bath and simply brushing away the residue. The small holes in the flame spreader can be cleared with a dental pick or medium-size sewing needle. |
|
|
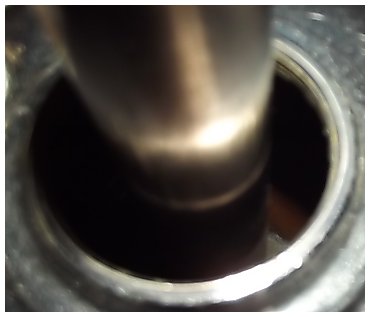
To clean the small diameter draft tube I used a popsicle stick wrapped with 200 grit emery paper. The citric acid bath had turned the gummy residue to a stiff granular oxide that could be sanded off instead of clogging the emery paper with sticky residue. Photo far right shows the polished draft tube. |
|
|
Another example with a larger lamp
|
The wick sleeve from a Miller Dresden being cleaned inside. Note the strip of thin plastic holding the wick grabbing prongs away from the sandpaper! |
|
|
The Miller Dresden was disassembled and soaked in hot citric acid for an hour to render the sticky residue into a hard oxide that could be readily sanded off. At right you can see the amount of grit and some actual brass removed from the inside of the Dresden wick sleeve. The sleeve was so rough inside that moving the wick on the draft tube was almost impossible. |
|
|
I cut away half the diameter of a 1 1/2" plastic tube, lined it with 200 grit emery, and sanded the draft tube on the Miller Dresden with vertical strokes of the sandpaper tool. The grime and some brass from roughness is shown on the emery paper. |
|

|
|
At left, the Miller Dresden wick sleeve assembly.
At right, the restored, assembled lamp. The wick sleeve now slides freely on the center draft tube! |
|
TEST THE FONT FOR INTEGRITY
It is an excellent idea to fill the font with fuel for the first time with the lamp in a baking dish or bucket for several hours, with a paper towel under the lamp, to check for leaks in the font. If there is a leak it is better to discover it at this point and fix it before proceeding, as a leaking lamp on an expensive table is best avoided.
REPAIRING THE FONT
|
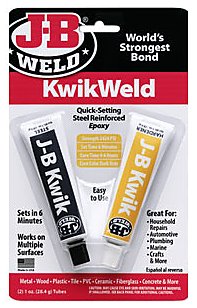
It is not uncommon to find pinholes in the base of the fuel tank on century-old fuel fonts. First empty the font. Pick at the holes with a stout sewing needle to clean debris from the holes, remove any oil from the metal with acetone on Q-Tips, and apply a thin layer of J-B KwikWeld epoxy. In 10 minutes the leak is sealed. The color of J-B KwikWeld is dark grey, so it will show if used on the outside of copper fonts. A minor pinhole leak does not show much darkness, however, and is far better than a leak! |
|
WICK INSTALLATION - LOOK AT ALL THE BURNER PARTS FOR DAMAGE
Victorian Era lamps were made for relatively easy wick installation as new - a century ago. Any damage or corrosion occurring in the past century can make wick installation very difficult. Now that you have all the parts disassembled they can be examined carefully for any damage that could inhibit wick installation. Some lamps, such as the Success, were made to very close tolerances and even slight damage can make wick installation a real challenge. Click on a photo below to enlarge it.
|
|
|
|
|
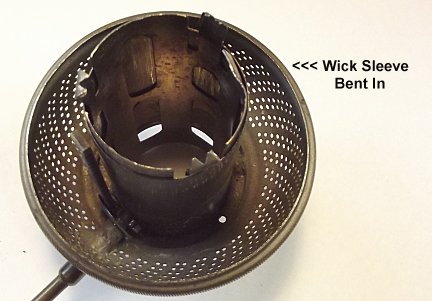
| Success draft tube after polishing. You can see where corrosion was removed. The wick must be able to slide easily over the draft tube to adjust the flame height. | The top right side edge of the wick sleeve was bent inward. The wick sleeve fits over the draft tube so the bend was intruding into space for the wick to fit and slide easily. | The outer wick tube was cut with a tubing cutter, and as the cutter blade wheel is cutting on the outside of the tube it leaves a sharp indent on the inside that can snag a wick. In the photo above the inside edge has been sanded smooth. | Above is a photo of the wick installed in the wick sleeve and a 1 inch diameter dowel cut from an old broom inserted up through the wick to smooth out any wrinkles. The wick then slides easily over the draft tube. |

Once the lamp is restored as shown above, it is ready to be polished and prepared for lighting following the directions listed the USE, CARE and WICKING of CENTER DRAFT LAMPS page.